Setting up a Squid proxy on a cheap cloud instance

Instantly access blocked websites using your own proxy
Published on
What is Squid?
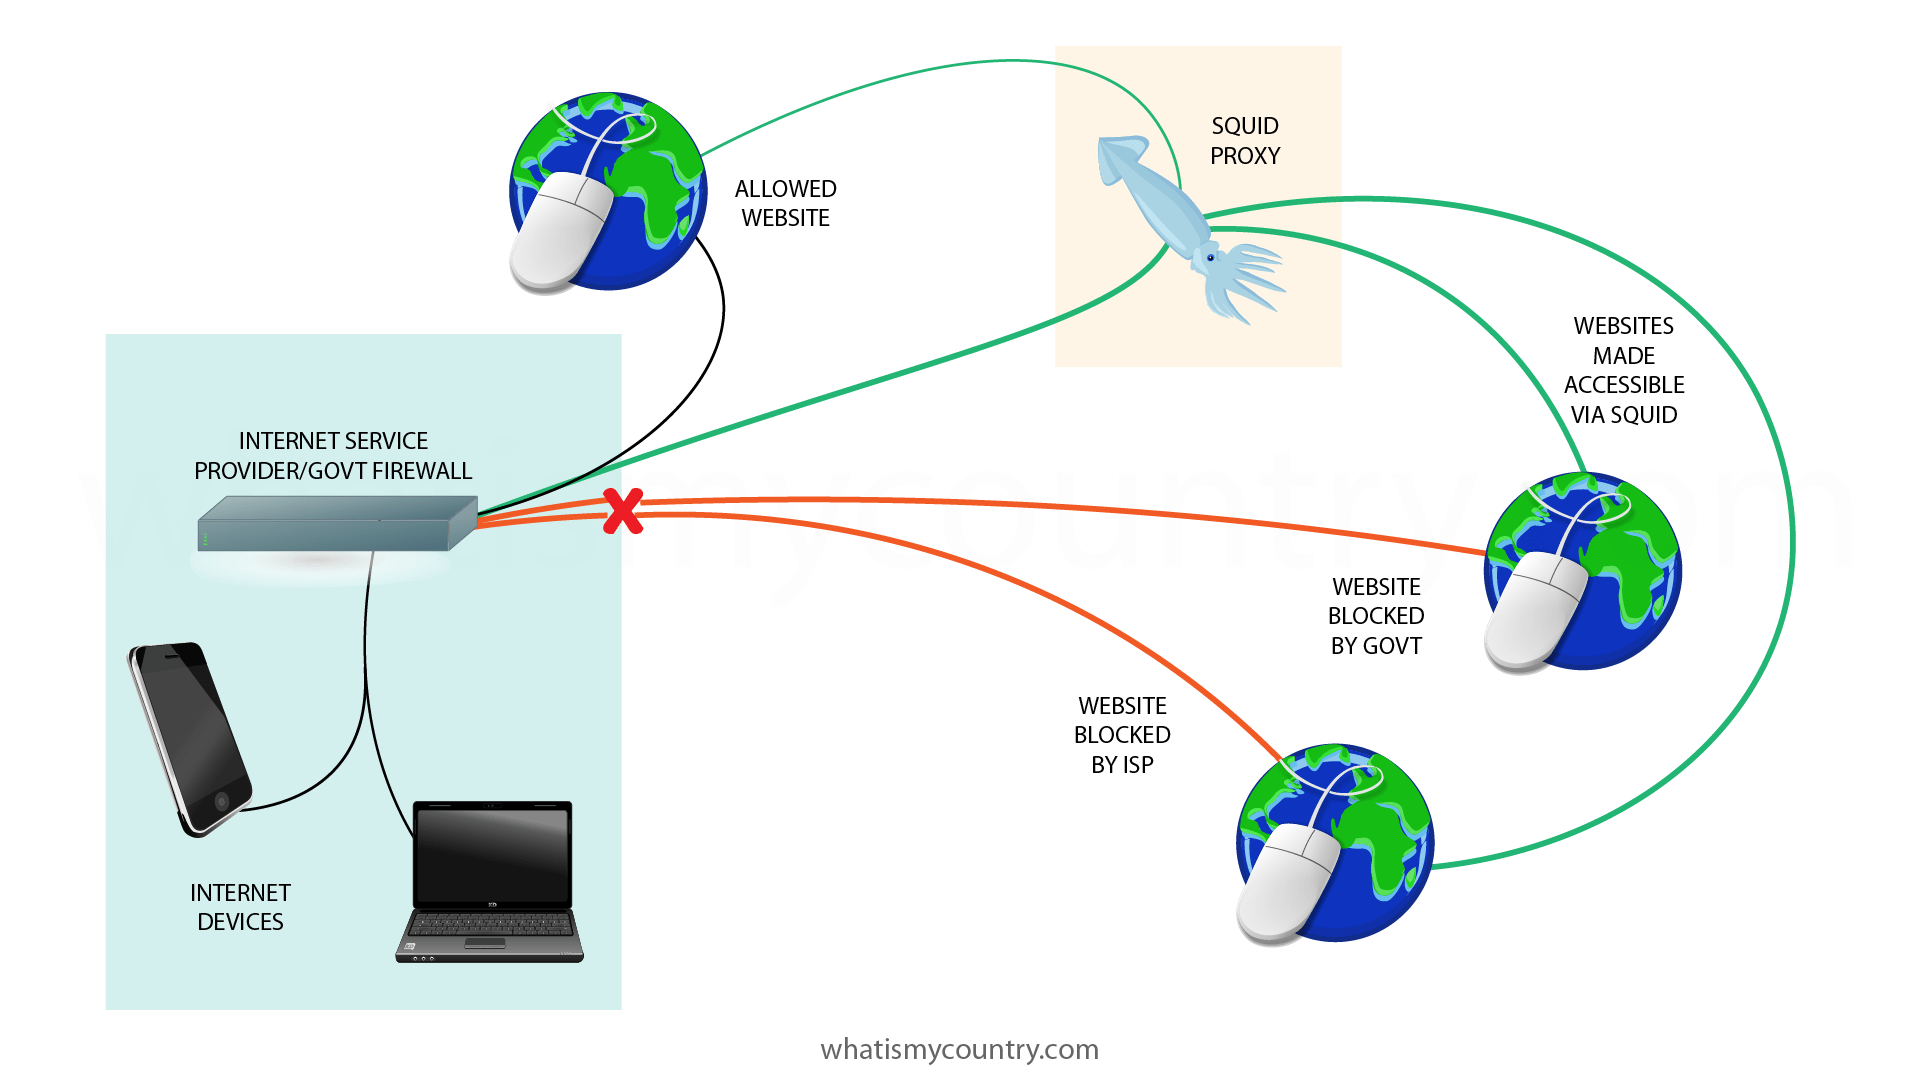
To understand what Squid is, you first need to understand what a proxy is. A proxy is a piece of software that runs on a system and acts as a mediator between you and the websites you are browsing. It has two main use cases:
1. A remote proxy can hide your exact location from any website that you are accessing, allowing you to bypass restrictions put in place by your network administrator, your ISP, or the websites you are unable to access normally.
2. A caching proxy can store data that you regularly access, such as images, stylesheets etc., potentially speeding up your internet access.

The second use case is becoming less and less relevant these days, thanks to CDNs and other advances with the HTTP protocol. For the purposes of this article, we are only interested in the first use case which will allow us to bypass censorship, or other restrictions.
Back to the topic at hand. Squid is one of the most popular open source proxy softwares around, and many ISPs still use it either for caching or for filtering traffic. We will set it up to just act as a relay for individual web browsing.
Basic requirements
Here is a list of what you will need for a small install:
- A remote server, running Linux, and preferably in a jurisdiction that does not block the kind of sites you want to access.
- Roughly 50MB of free disk space
- Minimum of 512MB of available RAM
- Some free bandwidth (depending on your usage)
- Basic server and Linux/UNIX skills
The server can be any existing one that you are using for other purposes, or a freshly acquired one. We recommend getting a small VPS or cloud instance.
Do take into account bandwidth limits. These could easily be hit, depending on your internet usage. While you may use the proxy to download 10GB of data, the server's bandwith usage will be twice that since it will be simultaneously downloading and uploading the same data.
Having basic knowledge of servers and Linux would make this configuration a lot easier. However, you should be able to just follow these instructions.
Quick Install
If you already have a remote system that can be used as a proxy server, as well as basic Linux knowledge, you should be able to get the proxy up and running in minutes using the following steps:
- Install squid:
For RHEL/CentOS/Fedora systems:yum install squid
For Debian/Ubuntu systems:apt install squid - Edit squid.conf:
vi /etc/squid/squid.conf - Create an ACL with your IP/network (we will call ours awnet):
After the lineacl localnet src fe80::/10
addacl awenet src 173.254.171.0/24 - Allow access for your IP/network:
After the linehttp_access allow localhost
addhttp_access allow awenet - Change squid's port number (optional). We will go with 48149:
http_port 48149 - Add your IP/network to the firewall rules:
iptables -I INPUT -s 173.254.171.0/24 -p tcp --dport 48149 -j ACCEPT - Enable and start the squid service:
systemctl enable squidsystemctl start squid - Configure your browser to use the proxy
- Head over to whatismycountry.com and verify that the proxy is working.
Detailed Howto
Hosting the proxy
The first thing you need is a place to run the proxy. Hosting costs can vary wildly, from less than $10 a month for a shared hosting setup, to hundreds of dollars for a dedicated server in a reliable data center. Unfortunately, your shared hosting likely will not allow you to install and run your own software, especially something like a web proxy.
Since the rest of the requirements are quite minimal, our suggestion is to go with a Virtual Private Server (VPS) or a small cloud instance.
If not configured properly, proxy servers can easily be misused for nefarious purposes. Therefore, many hosting services do not allow them. Make sure there are no such restrictions with your host, or you have prior permission to run it.
Which Operating System to use
Since Squid is an open source UNIX software, you will need a server running one of the many flavors of UNIX. Although there are countless varieties here, such as FreeBSD, HPUX, or even MacOS, for the sake of simplicity, we highly recommend a server running something from the Red Hat, or Debian family. This could be Red Hat Enterprise Linux, CentOS, or Fedora for the first family, or Ubuntu/Debian for the second family.
CentOS/RHEL/Fedora and Ubuntu are supported by virtually all hosting services and are tried and tested in countless production environments. Which option you choose is up to your preference, but the below instructions should cater to any of these variants.
Squid installation
Once your server is ready, all you need to do is to login through Secure Shell (SSH), or any other provided terminal, and run the following command:
For RHEL/CentOS/Fedora systems:sudo yum install squid
For Debian/Ubuntu systems:sudo apt install squid
For any other platform, you will need to consult its own package manager or install instructions. If you are tech savvy enough, you could also compile Squid from source.
Recommended Squid configuration
Squid's configuration is stored in the squid.conf file, and this should be the only file you need to edit. Its full path is typically /etc/squid/squid.conf so simply open it in your favorite editor:
vi /etc/squid/squid.confThen search for the following line:acl localnet src fe80::/10
and under it, create an ACL entry with your IP/network:acl awenet src 173.254.171.0/24
Next, search for the line:http_access allow localhost
and add an allow statement for your defined acl:http_access allow awenet
Some ISPs may block known proxy ports, such as squid's default 3128 port. In this case, it is necessary to change the port that Squid runs on. In this example, we will use port 48149.
Search for the http_port directive, and change it to look like this:http_port 48149
Enabling and starting the Squid service
Most Linux distributions have moved to Systemd init scripts, so we will only focus on these. The following commands should work on any recent versions of RHEL, CentOS, Fedora, and Ubuntu. For other OS versions, consult their documentation on how to enable/disable and start/stop services.
Firstly, enable the service so that it starts up the next time the server boots:systemctl enable squid
Next, start the service:systemctl start squid
This will start the squid daemon. However, we can't use it just yet.
Configuring your firewall to allow connections to Squid
If your system uses UFW, it will be as simple as:sudo ufw allow <port_number>/tcp
For this example, we will open up the TCP port 48149:sudo ufw allow 48149/tcp
If your system uses iptables, you can run this:iptables -I INPUT -m tcp -p tcp --dport 48149 -j ACCEPT
Caution!The above commands will open up your proxy port to the whole internet. While the ACL we added to the Squid configuration will deny requests from anyone outside your IP or network, it can still be the target of a DDoS, or buffer overflow attack. This is very dangerous without enabling authentication. Either enable authentication, or restrict access to your IP or network. Enabling both is highly recommended.
To restrict access to Squid by IP or network address, you can include a source parameter:iptables -I INPUT -s 145.239.231.0/24 -m tcp -p tcp --dport 48149 -j ACCEPT
Configuring your browser's proxy settings
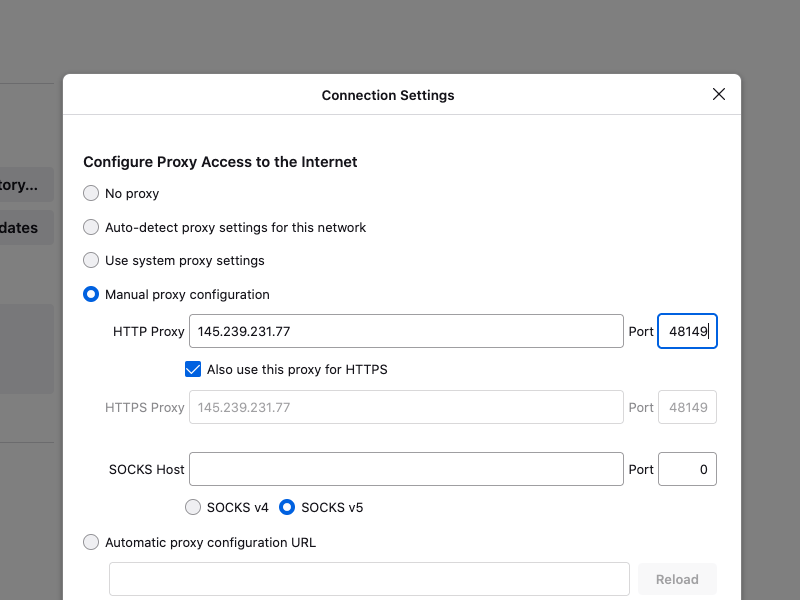
All we need now is to add the proxy info to your browser, and we will be ready to send traffic through it. Here we will demonstrate how to do this for the Mozilla Firefox browser.
From the browser menu, go to Preferences, then scroll down to Network Settings, and click Settings.

Next, select Manual proxy configuration, and input the IP address and port number of your proxy server. Then click OK.
Success
You are now ready to browse your favorite sites to your heart's content, without having to worry about snooping or censorship. To make sure the proxy works, head over to What is my Country, and see what country it thinks you are in.
If this still looks too complicated, or too much of a bother, you can just signup to a VPN service. These are simple to get started, and offer a number of additional benefits to a simple proxy. Click here to get 2 years of VPN service for only $3.71 a month.